Bud's Manx Restoration
Posted: Tue Jan 13, 2015 2:55 am
I wanted to be first to post a build/restoration thread here but I was too slow. Looking forward to Brian's build with Joe's awesome work
Bud had talked to me about doing some work on his Manx. Front end, wiring and possibly bedlinering his chassis. But once I got into it I found some body damage that needed some attention so the restoration was started.
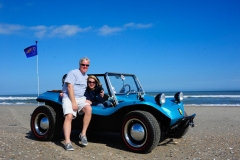
Here is Bud and Sue in their Manx before I started. (actually at MOTB 2013)

(so you can see what it looked like before)
So the first thing I did was take it apart


Here is where it all started. The hood had been repaired by a PO and only bondo was used to fill in the crack. This allowed it to flex and showed up as a small bump in the paint. You could see it if you looked at it from the right angle and you could feel it if you rubbed your hand over the area. I told Bud about it and since it had some other cracks he decided to have me repair the damage and paint the body. While I was at it he asked me to do a flake job on it. So here is part of that story.
I ground out all the Bondo and loose fiberglass.

I then covered areas with fiberglass cloth and sanded it.

I also filled in the hole where the fuel filler was. Then "faired" the areas out.

Then came the high build primer.


The first sanding of the high build primer.


Then the fairing primer that also acted as a base color coat.

Then the flaking.

(You can also see the wire tie anchors on the firewall)

(flake alone has a rough texture)


First few coats of clear. (many to follow)


Then more coats of clear.


(you can see the "orange peel" texture you get when trying to bury the flake)
About 8 top coats of clear, it is mostly smooth as it "flows out".


Close up of rear fender, looking pretty deep.
Next on to the wet sanding and polishing out, bedliner and wiring.
Vince
Bud had talked to me about doing some work on his Manx. Front end, wiring and possibly bedlinering his chassis. But once I got into it I found some body damage that needed some attention so the restoration was started.
Here is Bud and Sue in their Manx before I started. (actually at MOTB 2013)

(so you can see what it looked like before)
So the first thing I did was take it apart


Here is where it all started. The hood had been repaired by a PO and only bondo was used to fill in the crack. This allowed it to flex and showed up as a small bump in the paint. You could see it if you looked at it from the right angle and you could feel it if you rubbed your hand over the area. I told Bud about it and since it had some other cracks he decided to have me repair the damage and paint the body. While I was at it he asked me to do a flake job on it. So here is part of that story.
I ground out all the Bondo and loose fiberglass.

I then covered areas with fiberglass cloth and sanded it.

I also filled in the hole where the fuel filler was. Then "faired" the areas out.

Then came the high build primer.


The first sanding of the high build primer.


Then the fairing primer that also acted as a base color coat.

Then the flaking.

(You can also see the wire tie anchors on the firewall)

(flake alone has a rough texture)


First few coats of clear. (many to follow)


Then more coats of clear.


(you can see the "orange peel" texture you get when trying to bury the flake)
About 8 top coats of clear, it is mostly smooth as it "flows out".


Close up of rear fender, looking pretty deep.
Next on to the wet sanding and polishing out, bedliner and wiring.
Vince


