New dash panel??'s
New dash panel??'s
I'm looking at replacing the dash panel is it has 2 cracks in it and was wondering about the oriog vs the hinged models. i expect it would be easier to acces the speedo and guages with the hinged but is there really that much difference?. And does the hinge work well considering the speedo cable is attached to the back of the speedo -- is there enough slack to pull it out? I'd like to keep it fairly clean looking. I am also considering the side pods -- do you have to drill into the body to mount these? I think they look good for a street driven buggy which is what this will be mostly -- might hit a few rough dirt roads--
-
Siggymanx33
- Posts: 353
- Joined: Thu Apr 22, 2010 5:00 am
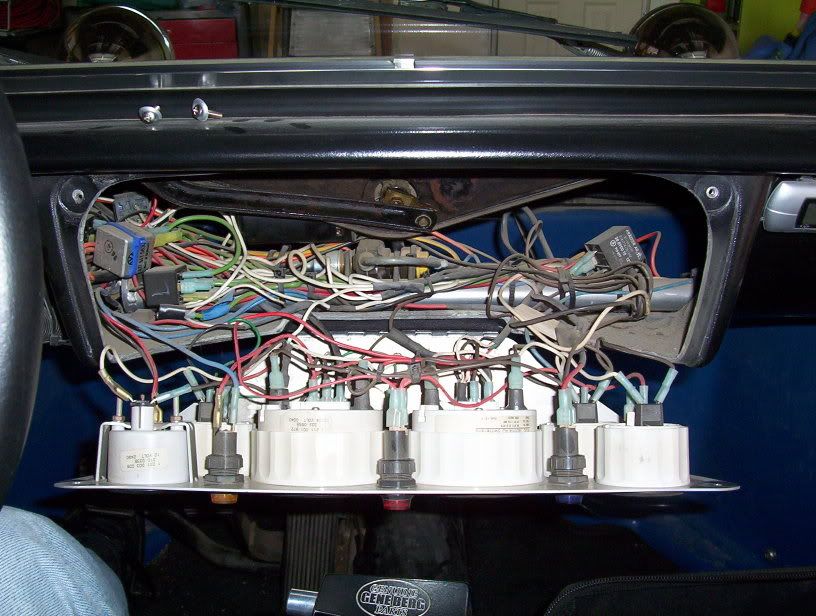
I've got the drop down dash and I like it. It makes troublshooting and initial wiring much easier. I've had to go back there a few times to troubleshoot some gauge problems that eventually ended up being a bad sended. It is pretty tight back there and the speedometer cable gives enough to get it open. It also prevents the whole assembly from falling forward when undone. Two things slighly bother me. It really reflects the sun and on sunny days it was almost hard to look at. I corrected this by covering it with some carbon fiber printed vinyl. Second, I went with the predrilled VW speedo hole. I understand it was placed where it was due to clearance issues with the wiper motor.....but, it is right in the line if sight with my steering wheel. I don't have a clear look at my idiot lights and that is of some concern. I may change that by placing some alternative lights somewhere else on my dash.
-
mel hubbard
- Posts: 841
- Joined: Sat Jul 23, 2005 8:00 pm
[QUOTE="delsol"]I'm looking at replacing the dash panel is it has 2 cracks in it and was wondering about the oriog vs the hinged models. i expect it would be easier to acces the speedo and guages with the hinged but is there really that much difference?. And does the hinge work well considering the speedo cable is attached to the back of the speedo -- is there enough slack to pull it out? I'd like to keep it fairly clean looking. I am also considering the side pods -- do you have to drill into the body to mount these? I think they look good for a street driven buggy which is what this will be mostly -- might hit a few rough dirt roads--[/QUOTE] It is possible to fit side pods without drilling into the body. I like the fold down dash panels, and lifting hoods just for ease,,, cant stand that head under the dash & feet hanging over the seat bit when sorting out a wiring prob,,,, but if your repacing the original dash with the fold down one just because of two cracks then maybe it would be just as easy to repair the cracks,,,,, as you would have to fiberglass the fold-down one onto your hood anyway. Speedo cable slack is no problem,,, you should have lots of it. :hello:
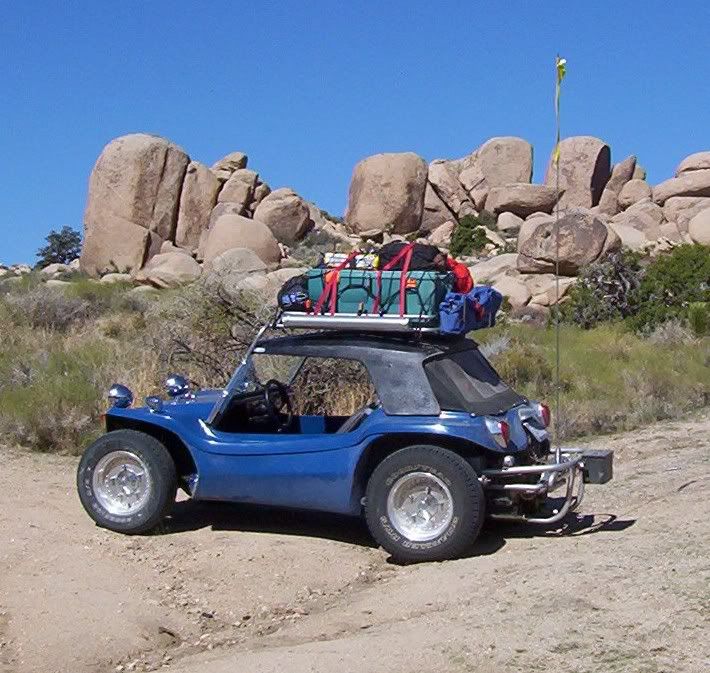
I also like the drop down dash. I have an electronic speedo, so I don't have to worry about the cable. Being able to remove the dash panel to drill out the holes was an added bonus. You have to drill holes in the body to mount the side pods. I didn't have a problem with this, as I think they really improve the looks of the buggy. They can also be used to store spare parts or other items. I drive on some pretty rough roads, so the undersides of the pods are getting scraped up. It's no big deal, as you can't see the damage unless you look under the car.
mel-- why would i have to fibreglass the new dash onto the hood? I have an ABS unti right now that has a crack dead center on the top and i'm not sure if it is repairable. As far as trhe pods -- how do you attach these without drilling through the body, and also store things in them if they are bolted in place? I have never seen any upclose -- just pics, I agree that they look good and finish the look of the buggy Lee - how does the electronic speedo work? I was looking on Don's sport buggy's page and saw them there ands was wondering if they would stand up. I also think that I want to stay kinda old school with this
I like the simplicity of the "one piece" dash. I wire and test everything before I install the hood/dash assembly and I haven't been bit yet...I did say yet. The flip down wiring panel I made for my buggy has worked out very well so far, it keeps me from diving under the dash, should a fuse blow. The new dash from the Manx Club is fiberglass, not ABS and when glassed to the hood it make everything much more solid and less prone to vibration and rattles. Here are a couple links to my gallery. You may get a few ideas on installing the dash and wiring. http://www.manxgallery.org/gallery/Buil ... range-Manx http://www.manxgallery.org/gallery/album224
"how does the electronic speedo work?" The electronic speedo counts the number of pulses to calculate speed. The pulses are provided by a hall effect sensor that is attached to the end of a stock type speedo cable (so it still uses the left front spindle). If you look closely, you can see the sensor in the center of this picture. It has a yellow cap on it:  You program the speedo by using a GPS (at least that's the easiest way). In programming mode, you tell the speedo when you are starting out, then you tell it when you have completed one mile. The speedo counts how many pulses per mile you have, then everything else gets based on that. You can use any size front tire you like and the speedo will always be accurate, provided you reprogram it if you change the tire size.
 You program the speedo by using a GPS (at least that's the easiest way). In programming mode, you tell the speedo when you are starting out, then you tell it when you have completed one mile. The speedo counts how many pulses per mile you have, then everything else gets based on that. You can use any size front tire you like and the speedo will always be accurate, provided you reprogram it if you change the tire size.
-
mel hubbard
- Posts: 841
- Joined: Sat Jul 23, 2005 8:00 pm
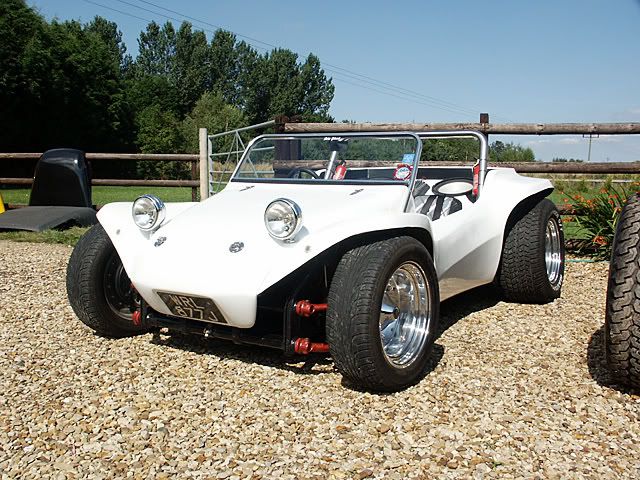
[QUOTE="delsol"]mel-- why would i have to fibreglass the new dash onto the hood? I have an ABS unti right now that has a crack dead center on the top and i'm not sure if it is repairable. As far as trhe pods -- how do you attach these without drilling through the body, and also store things in them if they are bolted in place? I have never seen any upclose -- just pics, I agree that they look good and finish the look of the buggy Lee - how does the electronic speedo work? I was looking on Don's sport buggy's page and saw them there ands was wondering if they would stand up. I also think that I want to stay kinda old school with this[/QUOTE] Jerry answered the dash panel one,,,, the side pods go under the pan,, where the body to chassis bolts pass through,,, they are held up from the bottom,, and normally bolted through the sides into the inner tub,,,, you can bond the sides to the tub (without using the bolts),,,,,, ive fitted a few by fiberglassing a 2''-3'' strip of fiberglass mat down the sides (pigmented black) where the pods meet the tub,,, you have to do a little grinding first,, but once fitted this way they look like they grew there,,,, the only problem is the side pods will have to be removed first if you ever need to take the body tub off,,, so the panel adhesive will need a knife run down between the body & tub,,, and the GRP will need a small saw ,, not a big job,,, but then how many times do you take a buggy tub off the chassis?. Dave,, got any pics of steves WIDE Manx??,,, stepped side-pod on the underside,, glassed in so you can remove the body with the pods fixed.
Ok if I understand right they bolt under the pan or in between pan and body? And Mel I'm trying to understand the glassing a 2-3" strip on the sides -- is that along the bottom sides horizantally or the left and right vertically? Are there any pics/thread showing the process of installing these pods. I really like the clean line of the white buggy -- I'm just not sure if I want to glass to tub as it is in pretty good shape. Also I noticed the liftable hood on the front of the white one -- nice touch!
-
Tom-Kathleen
- Posts: 610
- Joined: Thu Mar 11, 2010 6:00 am
- Location: Vernon, CT
When I had the side pods done on my FiberFab, I had the guy sandwich them between the body & the pan so the body would always be removeable. The body was off the pan during this process, so it was easy. Manx sidepods to not really fit this body, so spray foam was used to take up the gaps and fiberglass mat applied on top of that after it was shaped. You can see the resluts here: http://www.manxgallery.org/gallery/Toms-Fiber-Fab Tom.
Tom & Kathleen Iacoboni
# 1030
Vernon, CT
1968 Meyers Manx, 1971 Manxter S, 1972 KickOut SS (WIP)
# 1030
Vernon, CT
1968 Meyers Manx, 1971 Manxter S, 1972 KickOut SS (WIP)
-
mel hubbard
- Posts: 841
- Joined: Sat Jul 23, 2005 8:00 pm
[QUOTE="delsol"]Ok if I understand right they bolt under the pan or in between pan and body? And Mel I'm trying to understand the glassing a 2-3" strip on the sides -- is that along the bottom sides horizantally or the left and right vertically? Are there any pics/thread showing the process of installing these pods. I really like the clean line of the white buggy -- I'm just not sure if I want to glass to tub as it is in pretty good shape. Also I noticed the liftable hood on the front of the white one -- nice touch![/QUOTE] They bolt under the pan,,, and hide that bit of floor with the sharp bit that sticks out,,, the 2-3'' strip of glass mat runs vertically,, where you would normally bolt them down,,, but the real neat way is to cut the lip off first, so you are not glassing over that lump that you would otherwise be bolting through. The white buggy is a real chopped around Manx,,, i have done three of them like this for customers in the past,,, SORRY BRUCE,,, it is just over six foot wide,,, glassed in pods,,, but stepped on the underside to enable the body to be removed,, but still hide the pan,, and give that lower look,, the hood is the Manx lifting type that BM and myself used to sell,, the dash is a custom one that i moulded for Steve,,, the rear inner tub is taken up by a custom made GRP noize boyze set up,,, ideal for driving on surfaces as smooth as a pool table  Side pods are very popular,,, but i would never fit them to my own buggy unless they were made fully water tight,,, as Bruce says 'function & form',,, make em water-tight,, fit inflatable sponsons to the front & rear crash bars and paddle the thing accross that river
-
mel hubbard
- Posts: 841
- Joined: Sat Jul 23, 2005 8:00 pm
I bolted my side pods on by using the flanges on the leading and trailing edges. This required drilling through the body. Two bolts at each end for each pod is all it took. I didn't want to bolt them at the bottom, as I didn't want anything sticking down. Nuts or bolt heads can get hung up on rocks. I guess I'm not as timid about drilling holes in my car as I should be. 


