Dash support pics
Dash support pics
I'm about to make a dash support for my Manx clone.:help: Does anyone have some pictures or diagrams that I could use for making mine?? Thanks, Mark
Here is a link to my gallery, there are quite a few pics of the Manx dash support. http://www.manxgallery.org/gallery/album224 I hope it helps,
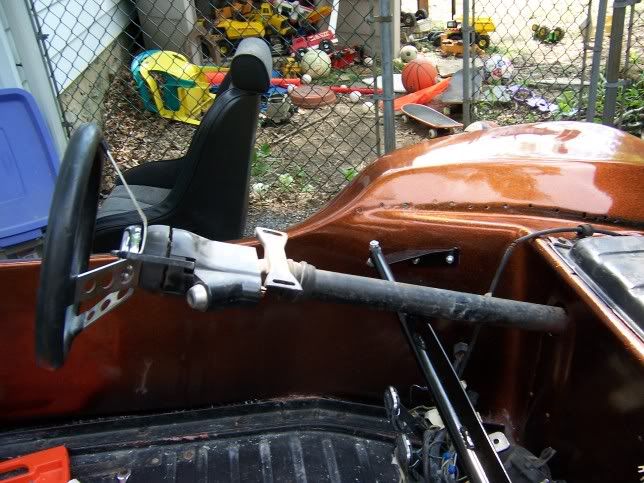
If your dash is fiberglass and is bonded to the rear of your hood, your frame just needs to be a vertical bar mounted on each end of a horizontal tube. The steering column is clamped to the horizontal tube and the two vertical uprights connect the windshield and hood to the body. There should be 3 bolts through each upright; two bolts that pass through the windshield frame and the sides of the hood, and one bolt at the bottom that goes through the body. The vertical uprights need to be curved and bent to follow the contour of the of the inner sides of the hood and the body. I borrowed the pictures from newmanx59. The top picture shows a frame that Meyers used with the original plastic dash. It needed the angle across the top for more support. The lower picture shows the same frame after it has been modified to use with a fiberglass dash. Its just a cross tube and 2 vertical bars. 

[QUOTE="markmark"]I have a fibreglass dash so the last picture looks like it would be most suitable for me. Thanks for the pics [/QUOTE] I stole the pictures from Jerry. If the hood and dash of your clone are the same as a Manx, the two bolt holes that hold the windshield should be drilled right on the seam where the dash and back of the hood meet. The vertical bars should run right up behind the seam. The bolt holes should be in the center of the bars(front to aft). As you can see in the two pictures, the vertical bars are kind of dog leg shaped. As they come down from the hood to the body, they bend inwards and forward. If I was going to fabricate a dash frame, first I'd make up the two side pieces and get them bolted into place, then I'd cut and trim a cross tube and tack weld it in place, right in the buggy. Then I'd remove it and finish weld it on the bench.
 [/QUOTE] I stole the pictures from Jerry. If the hood and dash of your clone are the same as a Manx, the two bolt holes that hold the windshield should be drilled right on the seam where the dash and back of the hood meet. The vertical bars should run right up behind the seam. The bolt holes should be in the center of the bars(front to aft). As you can see in the two pictures, the vertical bars are kind of dog leg shaped. As they come down from the hood to the body, they bend inwards and forward. If I was going to fabricate a dash frame, first I'd make up the two side pieces and get them bolted into place, then I'd cut and trim a cross tube and tack weld it in place, right in the buggy. Then I'd remove it and finish weld it on the bench.
The length was very close to what I needed. We cut the end off the Chevette column and found that the shaft was hollow. That worked out great as we had a piece of shafting and the mechanic at work welded the shafting in the hollow end. Used the milling machine to put a groove in shaft for the bolt where it clamps to the VW box. Very solid. In the picture you can see the weld where the shafting was attached to the Chevette column.