Filler neck advice needed...
Filler neck advice needed...
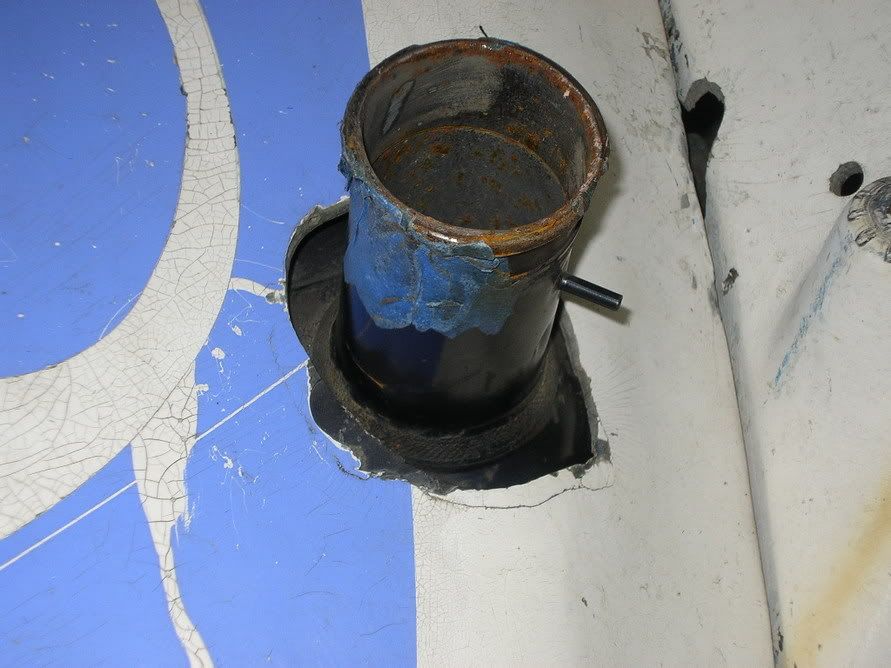
Attached is a pic of my buggy, I want to clean up this butchered hole they cut to clear the filler neck. Problem is it does need a bit of play to be able to slide a bit as I lift the hood off. As I pull the hood off I need to tilt and slide it forward to remove. Main thing I want to do is seal that hole so if I am out in the rain it is not just pouring in there... http://i25.photobucket.com/albums/c98/52zwitter/Buggyprogress005.jpg Anyone have any suggestions as to how I may be able to make this look better? Was thinking if there were some sort of rubber diaphrams or something I could attach to the body that seals the hole but stays tight around the filler neck??? Other thought is to section the filler neck itself, maybe cut it down 3-4" so I don't need as clearance on that hole... Any suggestions welcome. Thx
Pull the gas tank out, relocate a 2" diameter filler neck tube on the upper rear edge of the tank, connect it with fuel hose to a quality filler cap assembly mounted on the hood. Fill and repaint the old hole in the hood. You will gain a gallon of fuel capacity, not have to worry about fumes or leaks and make it look a lot better. . You should read this thread. http://www.meyersmanx.com/forums/showthread.php?t=3250 The filler in the top left of this picture is sold by buggy shops. it isn't expensive. 
I had same problem. First I repaired the hole then I cut the filler part down and welded it (in the same place) but just so it will stick out. basically I shortened it. then the hood will slide over it and keep a tight seal around it.. but i would move it to a higher spot for more fuel , If I had to do it again. I think??
I would not recommend that you shorten the filler neck where you have it now. My buggy had one when I bought it. Every time I filled the tank to the top, fuel poured out of the little breather pipe intil I had lowered the level in the tank by a couple of inches. I solved the problem with a longer neck as you have there. I had a similar problem with needing a big ugly hole to get the hood on and off. I never found a suitable grommet to make it look better.
[QUOTE="shaihulud"]I would not recommend that you shorten the filler neck where you have it now. My buggy had one when I bought it. Every time I filled the tank to the top, fuel poured out of the little breather pipe intil I had lowered the level in the tank by a couple of inches. I solved the problem with a longer neck as you have there. I had a similar problem with needing a big ugly hole to get the hood on and off. I never found a suitable grommet to make it look better.[/QUOTE] I have never have this problem. maybe you needed a longer breather hose or ??


-
Buggy-Bum-2
- Posts: 55
- Joined: Fri Apr 30, 2010 5:00 am
Somewhat on topic - is there anything I should know or any help hints when pulling the tank? I'm new to buggies & need to replace my tank (or at least clean it - it's full of rust). I see four bolts through the fenders and the bolts holding on the winshield - is that all there is to removing the "hood"? Can I leave the gauges in place and just tilt the hood up to get to the tank? Thanks
[QUOTE="BrianK"]Somewhat on topic - is there anything I should know or any help hints when pulling the tank? I'm new to buggies & need to replace my tank (or at least clean it - it's full of rust). I see four bolts through the fenders and the bolts holding on the winshield - is that all there is to removing the "hood"? Can I leave the gauges in place and just tilt the hood up to get to the tank?[/QUOTE] Brian, The front end of the hood usually hooks back under the body. The hood can't normally be lifted straight up, it needs to be tilted forward then lifted forward and up. Its a two person job. You probably also need to remove your headlights for clearance. Definitely remove the windshield first. You will probably damage some of your wires/connections if you try to remove the hood with everything still connected. The easiest thing is just like you say, remove the instruments and switches from the dash and let them hang.