Storage Box Build
Storage Box Build
About eight years ago I went in search of a solution to the problem of how to store and secure items in our dune buggy when we were out and about. The first thing I found was a fiberglass storage box made by Bandit Buggies in NV. Since the removable box was a bit pricey I wanted to make sure it would fit in the seating area of our Manx. Initially they were helpful in providing some dimensions but then stopped communicating with me. On to plan "B". Since I know my way around a table saw I figured I might be able to build one out of plywood that would meet my needs. What you'll see in the following pictures is what I built all those years ago and still use. Since I've been asked about this box from time to time I'll try to provide as much information as I can remember. I hope this might help someone.
There are more pictures in my gallery.
Bud
First thing I learned, as others have too, is that our beloved dune buggy bodies are not symmetrical therefore this box had to be built one piece at a time in the buggy. I started with the bottom/seat piece and cut it in the the shape to fit the seating area. Second piece was the back. While this might sound simple, remember what I said about a lack of symmetry. Third piece was the front. I knew I wanted the box to fit snug but not tight (so I could remove it but it wouldn't slide around) so I mocked up the front piece to have the same angle as the roll bar. Additionally, I wanted this box to be sturdy so I notched along the bottom edge of the front/face piece to fit over the bottom. Additionally, I wanted the sides and back pieces to sit above the edge of the seating area and I would "groove" the top to fit over them creating a water tight fit (you'll see this in later pictures. I used 3/8 inch sanded plywood for the box base, back, and sides. I used 3/4 inch sanded plywood for the front/face and top. In order to get the front/face piece to fit between the roll bar and the tire wells, I have to bevel the edges around the tire well. Here are some pictures:
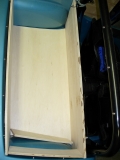
Next came the side pieces. I again "grooved" the front/face piece for the sides to fit and secure to the front more securely. Each side is VERY different from one another.
You can see in this picture how the sides and the back extend higher than the front. The top will fit over the sides and back creating a tight fit:
In these pictures you can see the multiple grooves and bevels cut into the front piece for the base, the sides, and fitment around the wheel wells.
Next step was to enclose the interior by building "wheel wells" around the wheel wells.
The top: there are multiple details about the top, first I used a router to cut a groove all the way around the interior of the top for the sides and back to fit into. What I didn't do is cut the groove past the front edge of the side. This way you won't see the groove when the top is down. Next was I had to grind down the trialing edge (back edge/lip of the top - edge over the motor) down so that when the top was closed it wouldn't hit the body. Oh in case you didn't know the body isn't flat across the back. Lastly I used cabinet hinges, instead of a piano hinge on the front, so that you wouldn't see them.
I added a little personal touch to the top of the top. I decided I wanted tie downs in case I needed to carry something that didn't fit in the box. To protect the finish on the lid I added oak slats. The tie downs are marine latch rings. Additionally I wanted to be able to lock the box so I added a marine flat latch (lockable). I have no illusions that if someone wants in the box they could "spring" the lid.
To give the box a little more finished look I glued in cheap indoor/outdoor carpet from Lowes (the stuff that they cut from a huge roll).
I painted the whole box with Krylon gloss black and then added about six to eight layers of Kylon clear on the top and front/face. After eight years the finish has held up pretty well and the box has met all my expectations.
There are more pictures in my gallery.
Bud
First thing I learned, as others have too, is that our beloved dune buggy bodies are not symmetrical therefore this box had to be built one piece at a time in the buggy. I started with the bottom/seat piece and cut it in the the shape to fit the seating area. Second piece was the back. While this might sound simple, remember what I said about a lack of symmetry. Third piece was the front. I knew I wanted the box to fit snug but not tight (so I could remove it but it wouldn't slide around) so I mocked up the front piece to have the same angle as the roll bar. Additionally, I wanted this box to be sturdy so I notched along the bottom edge of the front/face piece to fit over the bottom. Additionally, I wanted the sides and back pieces to sit above the edge of the seating area and I would "groove" the top to fit over them creating a water tight fit (you'll see this in later pictures. I used 3/8 inch sanded plywood for the box base, back, and sides. I used 3/4 inch sanded plywood for the front/face and top. In order to get the front/face piece to fit between the roll bar and the tire wells, I have to bevel the edges around the tire well. Here are some pictures:
Next came the side pieces. I again "grooved" the front/face piece for the sides to fit and secure to the front more securely. Each side is VERY different from one another.
You can see in this picture how the sides and the back extend higher than the front. The top will fit over the sides and back creating a tight fit:
In these pictures you can see the multiple grooves and bevels cut into the front piece for the base, the sides, and fitment around the wheel wells.
Next step was to enclose the interior by building "wheel wells" around the wheel wells.
The top: there are multiple details about the top, first I used a router to cut a groove all the way around the interior of the top for the sides and back to fit into. What I didn't do is cut the groove past the front edge of the side. This way you won't see the groove when the top is down. Next was I had to grind down the trialing edge (back edge/lip of the top - edge over the motor) down so that when the top was closed it wouldn't hit the body. Oh in case you didn't know the body isn't flat across the back. Lastly I used cabinet hinges, instead of a piano hinge on the front, so that you wouldn't see them.
I added a little personal touch to the top of the top. I decided I wanted tie downs in case I needed to carry something that didn't fit in the box. To protect the finish on the lid I added oak slats. The tie downs are marine latch rings. Additionally I wanted to be able to lock the box so I added a marine flat latch (lockable). I have no illusions that if someone wants in the box they could "spring" the lid.
To give the box a little more finished look I glued in cheap indoor/outdoor carpet from Lowes (the stuff that they cut from a huge roll).
I painted the whole box with Krylon gloss black and then added about six to eight layers of Kylon clear on the top and front/face. After eight years the finish has held up pretty well and the box has met all my expectations.
- RedBaronofRedBud
- Posts: 128
- Joined: Tue Feb 11, 2014 6:00 am
- Location: Southern Illinois
Re: Storage Box Build
Thank you for the great pictures, Bud. Barb and I are going to use yours as an example for Kermit. Hopefully, we will be able to pack like Canadians with it!
Tim and Barb Byrnes
#4236
Team Kermit
Long Haul League
ECVW 14
S2B 15
BTTB 15
Join us in St Louis for Manx in the Middle 2017!!!
Im not a complete idiot...there are pieces missing.
#4236
Team Kermit
Long Haul League
ECVW 14
S2B 15
BTTB 15
Join us in St Louis for Manx in the Middle 2017!!!
Im not a complete idiot...there are pieces missing.
- Bradspurplemanx2
- Posts: 7
- Joined: Fri Jan 09, 2015 9:14 pm
- Location: Lima, NY
Re: Storage Box Build
That is very sexy. Im think im going to get my carpentry experience back out and build something along these lines.
-
- Posts: 200
- Joined: Tue Mar 30, 2010 5:00 am
- Location: Ventura, CA
Re: Storage Box Build
Very nice Bud!!! Have you ever weighed it??? Or do you have a good guess???
Re: Storage Box Build
That's actually a good question. I've never weighed it but if I had to guess I'd say in the neighborhood of 20 lbs. It's actually in my garage while I'm waiting on my buggy rebuild. I'll have to empty it out and really weigh it. I'll report backManxManiac1 wrote:Very nice Bud!!! Have you ever weighed it??? Or do you have a good guess???
-
- Posts: 184
- Joined: Tue Mar 30, 2010 5:00 am
Re: Storage Box Build
Beautiful work Bud. Thanks for posting the process.
Re: Storage Box Build
Thanks for putting your project on the Forum where it can be referenced in the future.
Ed
Re: Storage Box Build
Nice job looks Great
-
- Posts: 200
- Joined: Tue Mar 30, 2010 5:00 am
- Location: Ventura, CA
Re: Storage Box Build
WOW... awesome job!!! I cheated & used a metal "military storage locker"!!! It's fairly waterproof & lockable & looks vintage with all of the vintage "surf stickers" on it!!! I think I paid about $5.00 for it at an estate sale about 15 years ago!!! Also made for a great place to mount my CB radio!!!
Re: Storage Box Build
Update on this build thread:
Years have passed and the wooden top I made, due to its weight, started rubbing on the body. Additionally, the cabinet hinges I used for the top really never worked well. 8 years later it was time to build a better mouse trap.
For a while I have been looking at the fiberglass trunk/package tray covers offered by Meyers Manx and ACME buggies. These covers mount to the body by bolting the hinges through the body and to the cover. They also have an optional fiberglass panel that mounts (again to the body) vertically behind the seats and secure your contents within the trunk/package tray area. Most of the trunk/package tray covers have some form of a headrest bump built into them, which was not my taste, so I continued to search for a flat cover. I found that ACME buggies offered a flat cover, so I ordered one in the color I wanted. Now what to do about the lack of hinges (the cover does not come with hardware) and the vertical panel (these were sold separately and cost almost as much as the cover itself)?
I first contacted Meyers Manx, since their cover did come with hinges, but they weren’t willing to sell me just the hinges. Now what to do? I reached out to a friend that had a Meyers cover and hinges and asked him for measurements so I could fabricate my own. They weren’t hard to make, and this gave me an excuse to buy a small band saw. With the hinges made, the next decision was how to mount the cover? Every hole drilled into our vintage buggy hurts my soul, so I decided to de-construct my wooden storage box and use the existing wooden insert. This would still allow me to have the fiberglass cover and the ability to remove the storage box all in one piece.
I have seen the hinges attached to the cover by drilling holes through the cover and having exposed bolts on the outside. This was not my style and I wanted a clean look, so I followed other’s examples and mounted wooden blocks with the bolts (glued with extra strength Gorilla glue) to the underside of the cover. I did this for the hinges and the locking latch – and yes there is a hidden latch with cable actuator to secure/lock the cover.
The hardest part to this project was aligning the hinges from the box to the cover. I mounted the hinges to the insert/box first and then placed the cover on and marked where the wooden blocks would be glued. For those with imagination, you might wonder how I could accomplish this alignment feat from outside of a closed box? While I considered bribing one of my grandkids to get inside of the closed box, I decided that part of my de-construction would be to cut off the vertical piece of the box (the surface directly behind the seats) so that I could lay inside the insert/box with the cover in place. After all the alignment and mounting I put the vertical piece back on the insert/box with screws – just in case my locking mechanism fails (cable breaks) and I need to access the inside of a closed box.
For those that might be thinking about a storage pod/box for your fiberglass buggy, here’s one way to do it without permanently mounting a cover to your body.
Pictures of the process (click on the picture to enlarge):
Lots of pictures here: https://www.manxclub.com/forum/app.php/gallery/album/45
Bud Zeller
Wilmington, NC
Manx Club Member Since 2004 - #2475
Member of the Manx Club's Long Haul League - 2015
2018 NORRA Mexican 1000 - #1356 - Bad News Racing
2022 NORRA Mexican 1000 - #3347 - Bad News Racing & ACME Companies
2023 NORRA Mexican 1000 - #1356 - Bad News Racing
'68 Meyers Manx - M1996F826S
'66 VW Kombi Bus
'73 VW Thing
Re: Storage Box Build
I like the new top, especially the stickers on the underside.
Re: Storage Box Build
Thanks. I'm hoping to fill that lid up one day with all the places we've driven the buggy. I need to add a 3rd country to that list. Hopefully soon. I also have a collection of "special and meaningful" stickers on the right.
Bud Zeller
Wilmington, NC
Manx Club Member Since 2004 - #2475
Member of the Manx Club's Long Haul League - 2015
2018 NORRA Mexican 1000 - #1356 - Bad News Racing
2022 NORRA Mexican 1000 - #3347 - Bad News Racing & ACME Companies
2023 NORRA Mexican 1000 - #1356 - Bad News Racing
'68 Meyers Manx - M1996F826S
'66 VW Kombi Bus
'73 VW Thing
Wilmington, NC
Manx Club Member Since 2004 - #2475
Member of the Manx Club's Long Haul League - 2015
2018 NORRA Mexican 1000 - #1356 - Bad News Racing
2022 NORRA Mexican 1000 - #3347 - Bad News Racing & ACME Companies
2023 NORRA Mexican 1000 - #1356 - Bad News Racing
'68 Meyers Manx - M1996F826S
'66 VW Kombi Bus
'73 VW Thing
Re: Storage Box Build
Looks great. Can you give me a ballpark of the interior space of the box? Dimensions length, width, and height. I'm planning something similar when I finally get mine. Thanks.
Re: Storage Box Build
Bud Zeller
Wilmington, NC
Manx Club Member Since 2004 - #2475
Member of the Manx Club's Long Haul League - 2015
2018 NORRA Mexican 1000 - #1356 - Bad News Racing
2022 NORRA Mexican 1000 - #3347 - Bad News Racing & ACME Companies
2023 NORRA Mexican 1000 - #1356 - Bad News Racing
'68 Meyers Manx - M1996F826S
'66 VW Kombi Bus
'73 VW Thing
Wilmington, NC
Manx Club Member Since 2004 - #2475
Member of the Manx Club's Long Haul League - 2015
2018 NORRA Mexican 1000 - #1356 - Bad News Racing
2022 NORRA Mexican 1000 - #3347 - Bad News Racing & ACME Companies
2023 NORRA Mexican 1000 - #1356 - Bad News Racing
'68 Meyers Manx - M1996F826S
'66 VW Kombi Bus
'73 VW Thing