Manx SR2 Build
-
hillmotorsports
- Posts: 129
- Joined: Tue Feb 24, 2015 6:07 pm
Re: Manx SR2 Build
Are the frame horns known for bending?
I don't recall seeing them reinforced before....
I don't recall seeing them reinforced before....
Rosemarie and Paul Hill
Morrisburg, Ontario
Canada
613 330 4862
Member #4502
Morrisburg, Ontario
Canada
613 330 4862
Member #4502
Re: Manx SR2 Build
One of my frame horns was bent up slightly. Maybe from a previous accident?? I have read many articles from Google and TheSamba that tell about frame horns bending down, usually on Baja cars and buggies from jumping etc. I squared everything up and reinforced with heavy-wall channel. Very strong now.
Manx SR2 Build
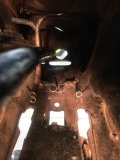
Finished much needed work inside the tube. Shortened and re-attached the emergency brake cable tubes as well as all four heater cable tubes. I may not use all the heater cable tubes, but now I have the option if I decide too in the future.

Shortened the shift tube and routed the clutch and throttle cable tubes out the back. Installed new fuel and brake lines. Also clamped a piece of poly pipe inside the tube to run my electrical through.

While disassembling the front beam I discovered a couple of broken torsion leafs in the top tube.

I replaced the top torsion leaf assembly as well as all the ball joints and seals.

I remounted the fiberglass inner tub and marked and drilled all the mounting holes around the outside edges, through the fiberglass. After removing the tub again, I drilled and tapped through the steel outer rails. The mounting bolts will now thread through the fiberglass and into the outer rails without sticking out the bottom.


Shortened the shift tube and routed the clutch and throttle cable tubes out the back. Installed new fuel and brake lines. Also clamped a piece of poly pipe inside the tube to run my electrical through.

While disassembling the front beam I discovered a couple of broken torsion leafs in the top tube.

I replaced the top torsion leaf assembly as well as all the ball joints and seals.

I remounted the fiberglass inner tub and marked and drilled all the mounting holes around the outside edges, through the fiberglass. After removing the tub again, I drilled and tapped through the steel outer rails. The mounting bolts will now thread through the fiberglass and into the outer rails without sticking out the bottom.

Manx SR2 Build
I used this simple setup to transfer the location of my roll bar support pads to the inside of the tub.

Now the holes are drilled in the correct location, through the tub and the rear support brackets, tied to the upper shock mounts.

Completed front support brackets between front axle beam and front clip / trunk area.

From underneath, looking forward.


Now the holes are drilled in the correct location, through the tub and the rear support brackets, tied to the upper shock mounts.

Completed front support brackets between front axle beam and front clip / trunk area.

From underneath, looking forward.

Re: Manx SR2 Build
Looks like you're moving right along, and will some awesome engineering and fabrication skills!
(Loretta) Manx # M2940D910E on customized 1970 chassis that has been "Wheelerized" by Joescoolcustoms
(Scarlett) Manx Resorter #12 (R0012B931S) on 1969 chassis.
(Gunther) Manx 2 # A0202A035E
Tow'dster # TF530G913S
Original Home built buggy that I learned to drive in back in 1995 (the one that started my passion).
Club Member # 4436
Loretta: http://www.manxclub.com/forum/viewtopic ... t=3365Manx" onclick="window.open(this.href);return false;
Re: Manx SR2 Build
oh my goodness what a terrific build. I got exhausted just looking at the photos. I never saw a tunnel shortened the way you did. it was most clever. your fabrication skills are over the top. people often ask why great cars cost so much $. I think you have answered that question.
Manx SR2 Build

Adding universal sliders to the seats. I'm concerned about headroom when the targa top is installed, so I'm trying to keep the seats as low as possible.

I made them as low as I could and still be functional.


Seat mounts welded in on both sides. Added support blocks in between.

Finish welded the vertical triangles at the rear of the floor pan.

A nice cozy fit and the sliders are fully functional.

Made some brackets and hung the tilt steering column.
-
ManxManiac
- Posts: 200
- Joined: Tue Mar 30, 2010 5:00 am
- Location: Ventura, CA
Re: Manx SR2 Build
Awesome build & very well thought out!!! What are the bucket seats you're using out of originally???
Michael Cates
ManxManiac
#958
Ventura, CA
Original Meyers Manx "Xena"
M1609C8S22
ManxManiac
#958
Ventura, CA
Original Meyers Manx "Xena"
M1609C8S22
Re: Manx SR2 Build
Thanks Mike,
I bought the seats new from speedwaymotors.com. They are "Scat ProCar Pro 90 Series".
I bought the seats new from speedwaymotors.com. They are "Scat ProCar Pro 90 Series".


