Manx II #1493 Build
Manx II #1493 Build
Hi Joseph,
I remember those pics from when you were telling me about the torsion covers. (Which I also bought.) I plan to copy that system pretty closely. Mostly the car will see some street and what you guys consider trail riding. It is pretty hard to go truly off road here due to the thick growth. If it tells you anything they used the area around where I live and typically go off road to train for Vietnam due to the tropical type environment. (They also filmed the original Tarzan movies the Creature from the Black Lagoon here.) Plus I tend to drive pretty sedately these days. I do need to find a source for the tubing end connectors if anyone knows of one. Here is the proposed cage minus the rear engine cage and rear down bar support:
I may change the top bars to a full X pattern, still thinking on that one. The base of the cage will be some 1.75 x 1/4 flat stock which will bolt to the pan the full length of the sides. The side bars will bolt on from the outside to provide a little more cabin room. (I am big guy, lol) Tubing for the cage will be 1.75x.125 for the main cage and 1.5x.125 for the rear engine cage. That should be plenty strong for a roll over and provide some side impact protection. Though if Soccer Mom Sally decides to drive her Suburban through the buggy at 60 mph I doubt anything short of a Nascar style cage will stop it.
I am going to see how the SA works for my type of driving. I have learned a lot from building this buggy and I am sort of thinking I will drive it for a year or two, see what I like and what I would change, then sell it and build another with a full tube chassis. (Just dont tell the wife that )
Thanks,
--louis
- jsturtlebuggy
- Posts: 652
- Joined: Wed Apr 07, 2010 5:00 am
Manx II #1493 Build
Are you talking about tube clamps that overlap and bolt together? If so www.kartek.com , McKenzie's, Camberg carry them. Gene used them on Gadget to install the cage.
Joseph
Manx Club #1095
Having fun with Buggies since 1970
Worked in VWs in shops since 1970
Manx Club #1095
Having fun with Buggies since 1970
Worked in VWs in shops since 1970
Manx II #1493 Build
Took a couple of days off to work on the buggy which meant my wife immediately filled them up with stuff to do around the house but I did managed to sneak out in the garage for a while and work on the hood.
I did this part exactly one year ago yesterday:
I was not real happy with the fit so after seeing how surfnc did his cap I went back and redid mine. I filled the "cup" I had previously made with fiberglass cloth and then slowly resunk the cap so the mounting flang is level with the top of the hood. This way the release catch on the filler cap doesn't hit the hood.
You can see the flange is level with the hood now instead of being below the hood. It took a lot of hand sanding to get that fit.
I cleaned up the mounting flange for the original dash, which you will see from a previous picture is now mostly missing. I plan to get a replacement from the Meyers and use the original lip as a spacer. The roll cage front hoop will then be able to run behind the dash. At least that is the current plan.
The other hood repairs are all pretty basic but this one has me worried. The break is right in the middle of the rounded lip and I am still trying to figure out how to get the shape right. Any ideas?
BTW, thanks to who ever mentioned washing off with cold water after working with fiberglass, it really seems to help keep the itching down.
Thanks,
--louis
Manx II #1493 Build
Spent the day stripping the underside of the body of accumulated grime and paint to get it ready for the last of the 'glass work and hopefully paint. I picked up a Harbor Freight soda blaster for $99 and a 50 lbs bag of XL blasting media, $35, and went to work. I have to say that I was really impressed with the soda blaster. It stripped everything off except the 1/4" layer of crap in the back that looks to be a combination of dirt and engine oil. That stuff even gave the wire wheel mounted on a grinder a hard time. I was able to get 90% of the body done with the one bag of media so I will finish it next weekend after I run by HF and pick up another bag.
In other news, instead of fixing my hood I decided to order a new replacement hood for the Meyers. I am waiting on it to ship and it will hopefully be here in the next couple of weeks.
--louis
In other news, instead of fixing my hood I decided to order a new replacement hood for the Meyers. I am waiting on it to ship and it will hopefully be here in the next couple of weeks.
--louis
-
- Posts: 99
- Joined: Mon Mar 29, 2010 5:00 am
Manx II #1493 Build
Aw man, no you have to re-do your fuel filler. Again.
Manx II #1493 Build
Yeah but with all the practice I should be really good at it.
Besides, I have redone everything on this buggy at least twice so why should the hood be any different.
--louis
Besides, I have redone everything on this buggy at least twice so why should the hood be any different.
--louis
Manx II #1493 Build
New hood showed up today from the Meyers. It cost as much to ship the hood as it did to buy it. Also shown is the new dash I ordered a couple of weeks ago:
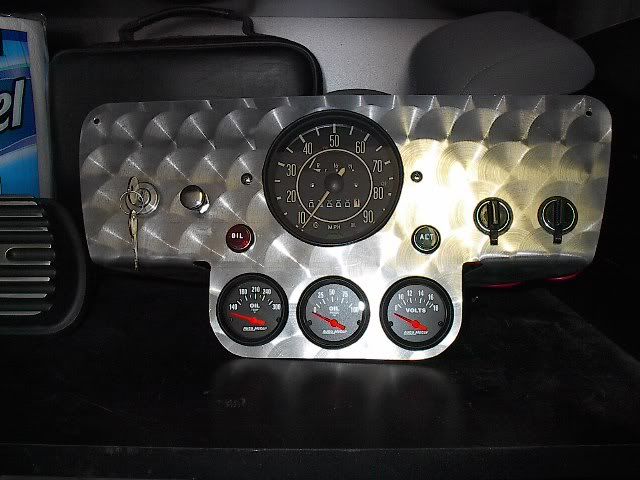
I am thinking of metal turning the aluminum insert for the dash. With any luck the body will be ready for primer in a few weeks. Budgeting for paint I figure I am in to this body for almost $2,500. Of course mine was in pretty sad shape when I started.
--louis
I am thinking of metal turning the aluminum insert for the dash. With any luck the body will be ready for primer in a few weeks. Budgeting for paint I figure I am in to this body for almost $2,500. Of course mine was in pretty sad shape when I started.
--louis
Manx II #1493 Build
Here's what I had done to mine. I think you'll like it.
Bob
Bob
Manx II #1493 Build
Hi Bob,
I plan to "borrow" a couple of ideas from your awesome buggy.
--louis
I plan to "borrow" a couple of ideas from your awesome buggy.
--louis
Manx II #1493 Build
Lewis,
Borrow away, Lord knows I've borrowed a few over the years. I have a spare insert (like mine) for the drop down dash. The extra space for the gauges helps keep the congestion down. It's not turned.
Thanks for the complement, your doing some awfully nice work yourself. I especially like that recessed filler cap.
Bob
Manx II #1493 Build
I like the extension at the bottom of the turned dash.
Manx II #1493 Build
Bob, did you do the turned dash or did you have someone make it for you?
Thanks,
--louis
Thanks,
--louis
Manx II #1493 Build
Louis,
Someone did it for me. He no longer does it because he got burned on some VW work. Shame because he did excellent electrical work for a reasonable price.
Bob
Someone did it for me. He no longer does it because he got burned on some VW work. Shame because he did excellent electrical work for a reasonable price.
Bob
Manx II #1493 Build
More fiberglass work today. (itch, itch)
Started by hot gluing the wiring tubes to the underside of the body, then laying some cloth over that to make it permanent. Early Manxs came with these from the factory but my II, which was produced after Bruce left the company, didn't have them so I decided to add them:
The top lip of my new dash was warped so I am trying to straighten it some here in this pic:
Hood Part Deux. Waiting on the filler to dry so I can sand it:
Here you can see the 3" extension I added using a section from the original hood. The plan is to make the new dash removable and run the front hoop of the roll bar behind the dash. we will see how it works.
In other news I am buying the last of the engine parts I need. I did decide to go with a small stroker crank and picked up a 74mm CB 4140 crank a few weeks ago. That will give me a 74x92 or a 1967 which is also the year of the pan. If for no other reason I could not pass it up just for that. It should help out with the taller tires and possible Bus reduction gear boxes in the future.
--louis